Getting Started Guide for ClassScape
Welcome to ClassScape! We're here to help you navigate setup and getting started as a new user!
ClassScape can be found at: https://class-scape.vercel.app/
Joining A Room
For Students
- Navigate to https://class-scape.vercel.app/
- You should see a screen that looks like this:
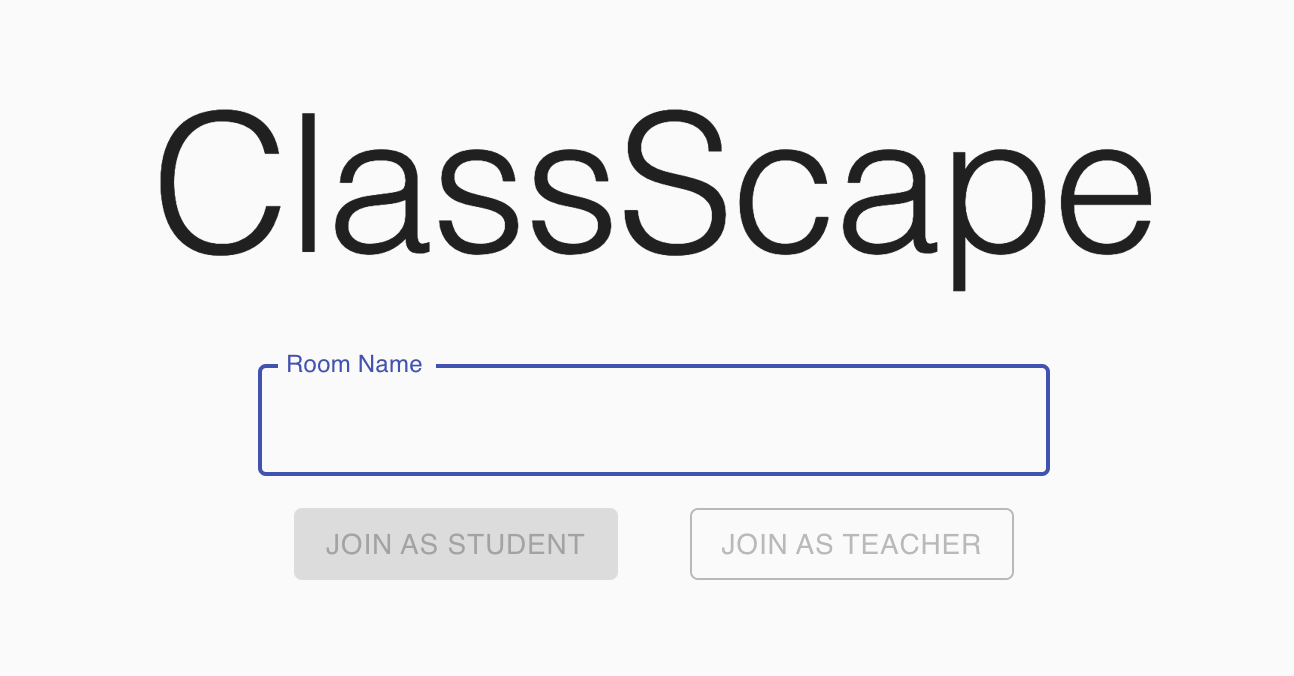
- Enter the room name given to you by your instructor (case sensitive) and click the "JOIN AS STUDENT" button
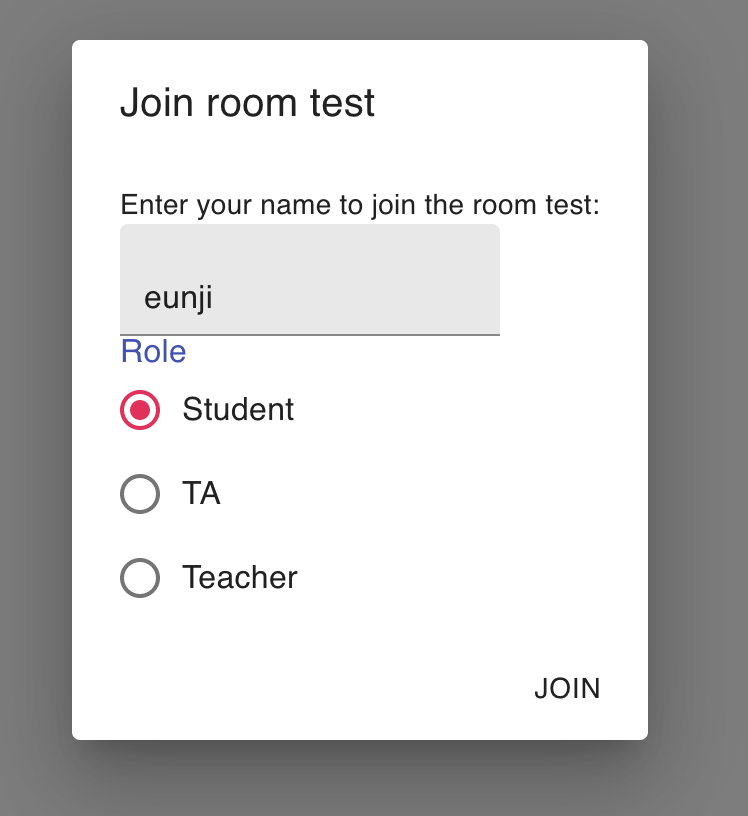
- You will then see a dialog that looks like this. Enter your name and select "Student" as your role:
- Congrats! You've made it to lecture!
For Instructors
- To join an existing room, follow the same steps as For Students above, selecting "TA" or "Teacher" as your role
- To create a new room, follow the steps for creating a new room
Navigating a Room
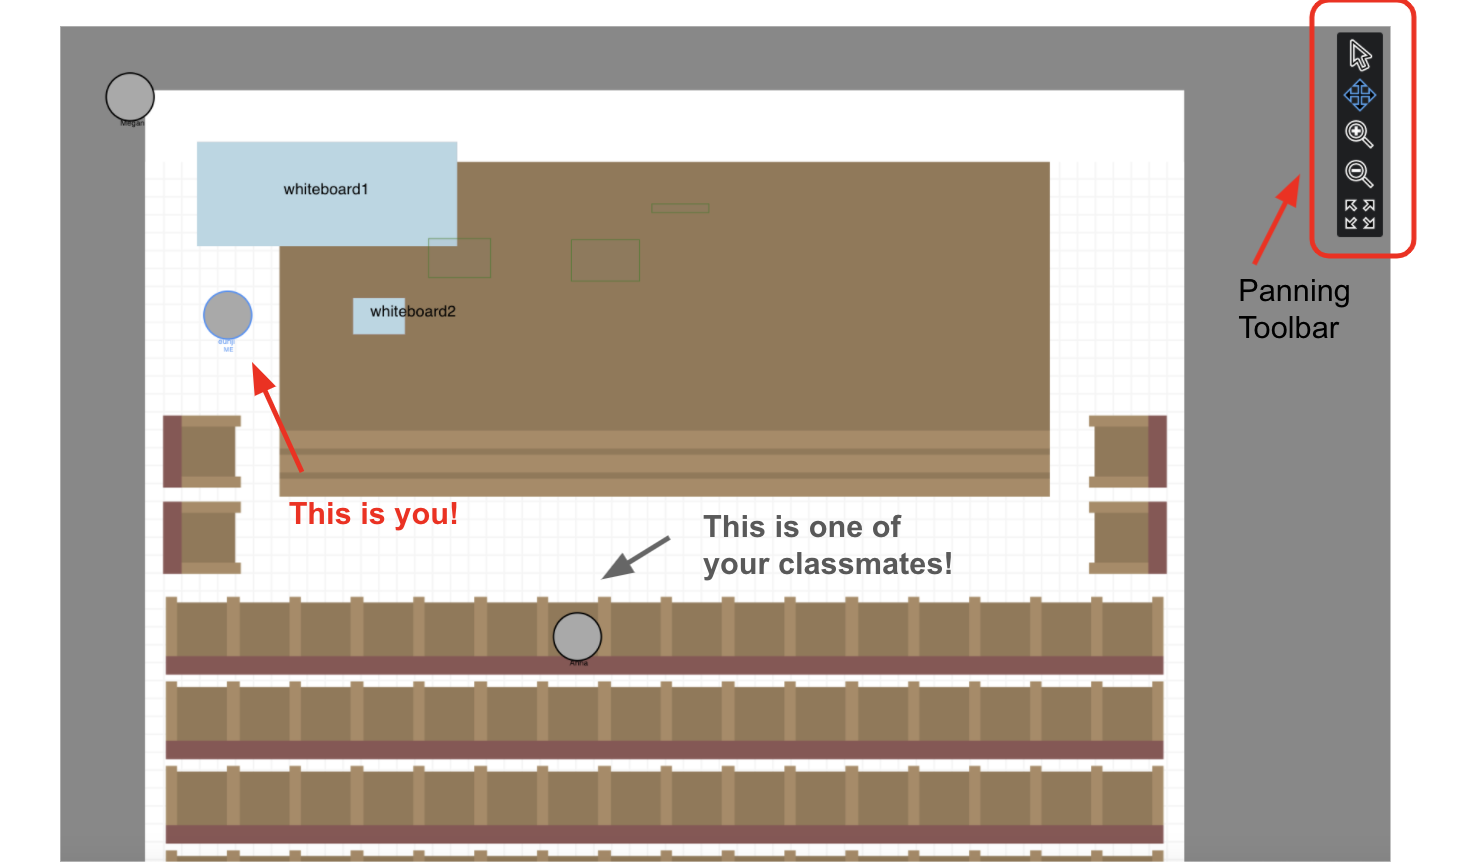
Move Around The Classroom
- You appear as a highlighted circular (avatar)! Your avatar is labeled as "ME"
- Classmates appear as unhighlighted circles
- Instructors and TAs appear in a different highlight
- Use the arrow keys to move around the 2D space!
- Use the panning toolbar (right) to zoom in, zoom out, and refocus as needed. There are also shortcuts on the top toolbar you can use for this as well!
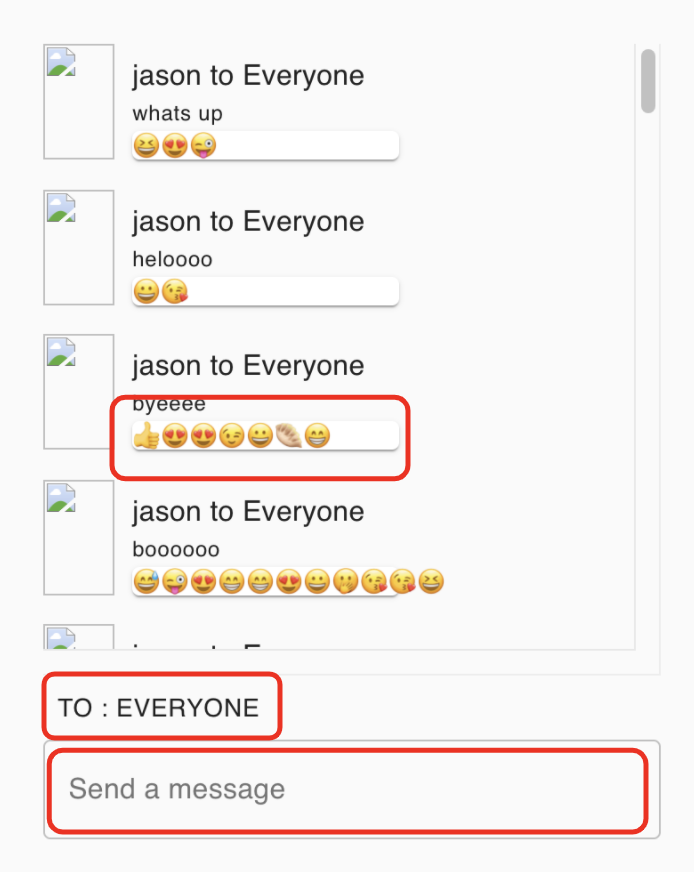
Using the Chat
- Type a message in the chat box ("Send a message") and your classmates and instructors will be able to see it!
- You can also send a private direct message by clicking on "To: Everyone" and selecting the person you want to message
- Add reactions by clicking on a message! You can add as many as you want!
Using the Toolbar
- To unmute and re-mute, click the "Microphone" button
- To share your live video within your avatar, click the "Video" button
- To share your screen, click the "Share Screen" button
- To make sure everyone can hear you in the room, regardless of breakout rooms, click the "Shoutout" button (instructor side only)
- To enable creation of breakout rooms, click the "Breakout" button (instructor side only)
(note: ignore the "Listening" button for now - that is a feature in development!)
View a Whiteboard or Projector
- Click on a blue whiteboard in the main room
- You'll be brought to a larger whiteboard or projector screen!
- You can draw on the whiteboard now! Use the pencil icon to draw, trash can icon to erase, etc.
- To view a projector, click on a purple projector in the main room
- You'll be able to see the shared screen content of a projector
Create a Whiteboard or Projector (instructor side only)
- On a room template, you can click on any brown Whiteboard placeholder to set up a new Whiteboard there!
- Enter a name for the whiteboard, and it will turn blue and expandable via click!
- Projectors are purple, and you can display your shared screen content on them!
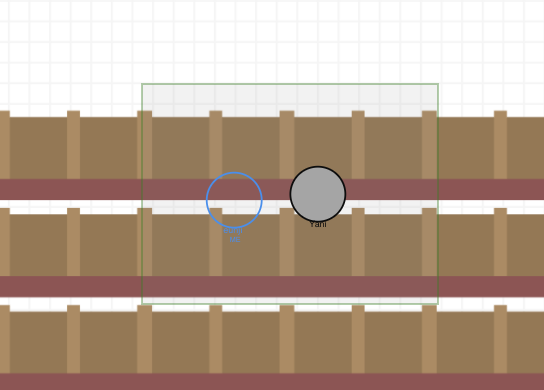
Creating a Breakout Room
- Drag with your mouse to create a box around you and the people you want to be in a breakout room with
- Now you can only hear people in your room, and only they can hear you!
- Click inside the breakout room to dissolve it instantly and "re-enter" the main room!
- Note: you can only create and join breakout rooms if the instructor has enabled it